Debbie explained how it occurred to her one day that in the case of a bad cable cross, there was really only one "arm" of the cable that was in the wrong spot. So why should she drop the whole cable down to fix it? She taught us the following process for fixing a bad cross by only dropping the offending side.
NOTE: Deb was very firm and consistent in regards to how to perform this sort of surgery: With your knitting FLAT ON THE TABLE. You wouldn't want a doctor to hold you up to his face while he is cutting out your appendix, right? Well, keep the knitting flat and well-lit too. Having all the tools at hand before you start is also a really good idea, as wandering off and leaving loose stitches is probably sort of asking for trouble.
Also, I haven't tried it, but this should work no matter how far down the cable is messed up, though the farther it is, the more of a drag picking up stitches will be.
Step 1: Freak out

OMG! That cable was TOTALLY supposed to cross in the BACK not the front! Aaaack! What do I do? Lie down in the road and wait for a bus?
No! Take a deep cleansing breath. Say your favorite calming mantra, and assemble the following tools:
- a cable needle or a short double-pointed needle (a size or two below your knitting size will make things easier),
- a crochet hook,
- a glass of your favorite beverage.

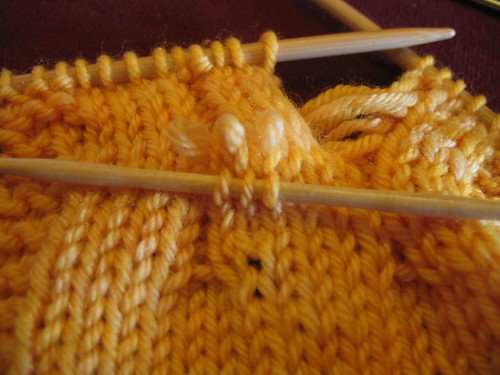
Using your cable needle, grab the stitches of the arm that you are fixing (in this case we want to move that back cross to the front) just below the cross. This way, when you start dropping stitches they won't run all the way to the bottom of the piece if you get woozy.
Step 3: Ready, set, DROP!

Carefully loosen just the (in this case, 3) stitches of the side you are dropping. Remember, the beauty of this method is that you don't drop the whole cable, just the side that needs to move. If your hands are too shaky, you can use a crochet hook or the tip of a knitting needle to calmly and slowly drop the stitches down behind the cable.
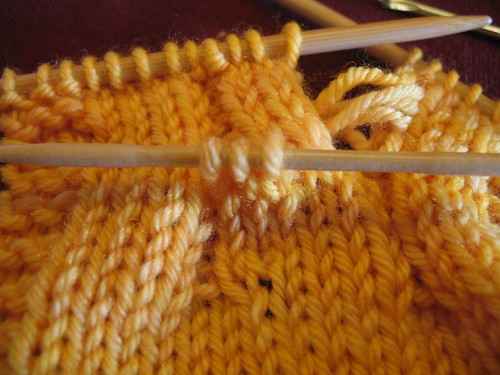
Step 4: Drop til you pop
Keep dropping stitches until they "pop" out from behind the front cable. Then stop. This may be before your lifeline.
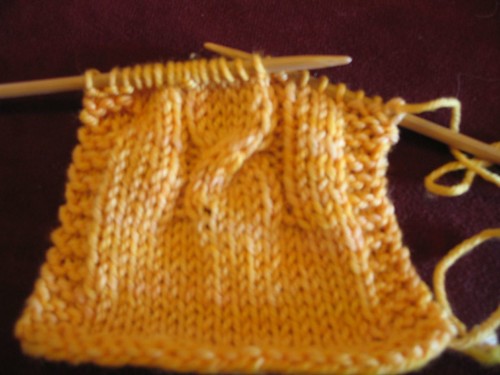
Step 5: Put the loose stitches on a needle
If you didn't have to drop all the way to your lifeline, move the cable (or dp) up to the loose stitches.
Step 6: Hook 'em!
I couldn't get a picture of this step, but hopefully the gist is clear. If you haven't ever used a crochet hook to pick up stitches, check out this tutorial first.
You want to take your crochet hook and grab the first "rung" of the ladder in back (make sure to double check that it is the FIRST rung, it may not be clearly visible from the front) and pick up a stitch for each of the free stitches. You will be holding the loose cable in front and picking up the stitches on each rung. You can do this stitch by stitch (pick up the first stitch all the way to the top and put it on the working needle) or one rung at a time (pick up all three stitches before moving to the next row, putting all three on the working needle when you are finished). Personally, the latter method worked better for me, as the ladder can get pretty tight by that third stitch.
Once you get all the loose stitches back up to the top and on your working needle, sit back, take a long pull off of your beverage of choice and metaphorically pat your crafty self on the back.
No comments:
Post a Comment