Where it will go....
Last week, I found a mistake in my Sunshine Wrap. I appreciate all the comments folks left pro and con, but I ultimately decided to rip back to the mistake and fix it. I did this for two reasons: 1) It would have really bugged me, and 2) Having never ripped lace before I had to know if I could do it or not.
I wasn't using a lifeline, and this little adventure has proved that at least on this piece, I don't really need one.
NOTE: A couple of things made this process particularly doable: size 10.5 needles and smooth wool/mohair blend fiber. If this had been Kid Silk Haze on size 3s, I may have been more willing to accept the imperfection as an homage to the knitting goddess.
Here is the lace ripping adventure:
1. Get Ready, Get Set
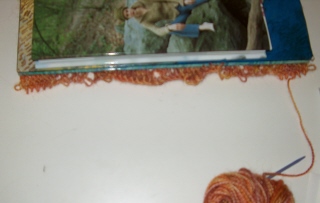
First, I used two hardback books—the bottom one is as wide as my Wrap—to weigh down the piece. This will prevent tugging, slipping, and unplanned dropped stitches. I am going to be leaning over the Wrap to put the stitches back on the needle, so this will also give me something stable on which to lean. After I have the books positioned right under the needle, *zwoop* out it comes!
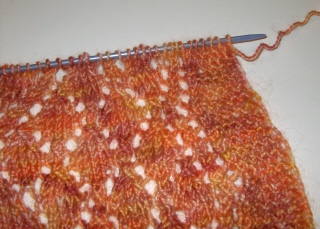
2. Knit side ripping
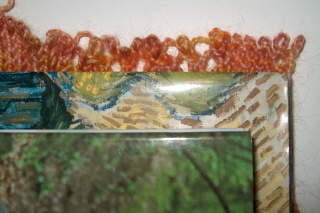
My lace is one-sided. So, the WS is always purled and all of the yarn overs and ktogs and whatnot happen on the knit side. Even though my mistake is on the knit side, you can see how tricksy picking up stitches on this side would be, so I am going to rip just past the error to the purl side.
3. Purl side ripping
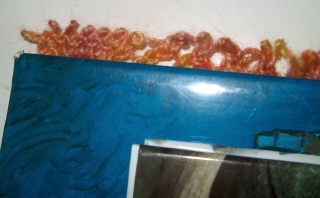
I am not sure if you can tell or not, but the purl stitches are much more orderly.
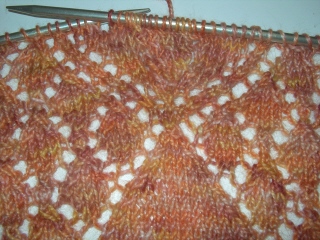
4. Pick up lines
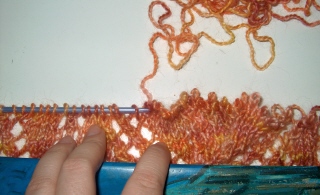
I ripped just to the end of the mistake row, and then I began to insert the needle (two or more sizes smaller than my knitting needle - makes it less likely to pull out the approaching stitches) into each purl as it is ripped. If you rip the row completely and then try to get the stitches back on the needle you run the risk of missing a stitch or (worse) losing a yo in the process.
Here, I pull out one stitch at a time and put it on the needle before going to the next. I am not concerned with the direction of the stitch on the needle, I will remedy any backwards stitches on the next step.
NOTE: I think it is easier to re-thread the stitches from this direction (rather than turning the piece upside down so that I wasn't leaning over it). Since this is the view I have had of the piece while knitting it, I feel like I can "see" the stitches better.
5. Mission (almost) complete!
All of the stitches are now back on the small needle. You can see how loose they are... At this point I can take the books off.
6. Deja vu

After all of the stitches are back onto the smaller needle, I use the pattern needle to carefully knit the next pattern row, untwisting any problem stitches as I come to them.
7. Success!
Here is the previously offending row, now patched right up.
No comments:
Post a Comment